Missin’ the Flame

I’ve taken off a few days from the torch to travel to SoCal for my partner’s parents’ 50th Anniversary. Been either a) time-lagged or b) busy since returning Monday morning (very early), so haven’t had time at the torch.

Last week I pulled some pretty successful twisted cane. I want to do a few more color combos, then figure out a design for beads using them. Need a little more application practice, truthfully, so will not use my fancy glass.

I am debating getting a large-ish lot of Bullseye rods. I’ve never loved working with it, but I think I just need to do more. The advantage is that I also use Bullseye COE-90 for fusing, and rods always come in handy for that. I really want to do more fusing, but have felt a bit intimidated of late, due to recent mmmm…shall I call them “failures”? Ok, yes, I will. Free weekends coming up mean I really should do some fusing and PMC.

Complex Twist!

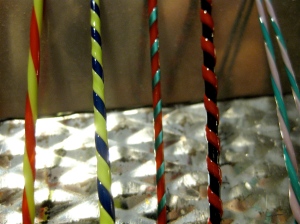
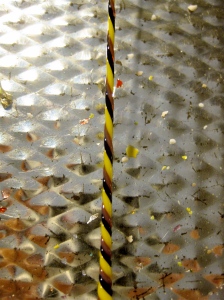
Hooray! I successfully twisted a cane with 3 colors! It wasn’t a pretty process (one of my punties broke near the base, and I had to remelt it and get it to harden, while still keeping the “blob” of three colors flowy). The end result looks like I knew what I was doing, pretty much.
complex twistie

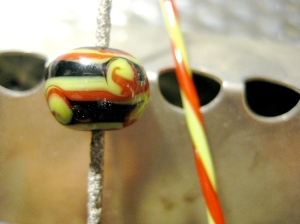
Of course, the next big step is learning how to actually use the twisted cane. I tried it on a black base bead. The colors were pretty enough, but I got the cane too hot and it lost its integrity.
mediocre use of twisted cane stringer

As I’ve said before, stringer application is one of my weak points as a lampworker. I’d like to take a class focussed solely on pulling and applying stringer.

Twisted Cane

Yikes! this is hard! Glass is pretty predictable when you are just sort of melting it, but getting it just hot enough to stick to another heated rod without losing the “rod shape” — and stay that way after it cools a little: Well, it’s kinda tricky. Then add the element of puntying the ends and having THOSE rods stay firm-ish, not melt into the rods you are wanting to twist: Gotta pay attention. The last thing is knowing when to start pulling after you remove the blob from the heat. Too soon, and the cane is much too thin. Too late, and you end up with about 2 inches of cane. Then you need to twist both ends at the same rate. Out of all of my attempts, the second one was the best (from left to right) and the last one was the longest, and I never had to deep six an attempt. Not perfect, but I’ll take it for the first real try at twisting cane. I’ll work up to complex cane by Wednesday.

Twisted Cane: 2 colors

This Week’s Project

Well, randomly opening Passing the Flame took me to twisted cane stringer.

My heart sank. Even pulling simple stringer is not my strong suit. But I REALLY need to know how to do twisted cane. It opens up design possibilities considerably.

Guess that’s why the book opened there 😉

Goddess Beads

Caelyth

If you Google on “goddess bead,” you’ll see a lot of very lovely, female-shaped beads. Well, I actually have no desire to make a bead like that. My Goddess Beads were made specifically for a Sensual Goddess party I attended on Saturday night. There were to be seven of us, and besides eating, drinking, sharing poetry and stories, we also planned to share gifts.

I got myself in a Goddess Groove on Friday night, and sat at the torch for 3 hours, one of my longest sessions ever. I felt exhausted and energized at the same time when I finally shut down at 10:30 PM, beads soaking in the kiln to be revealed as successes or failures next morning. The beads were pretty large, and I’m always afraid large beads will crack from not staying properly hot while I work on them (between prepping* and working the glass, each bead took about 15-20 minutes to make). I was so happy to see all seven beads turned out crack-free, and quite pretty as well. I made them focal beads on various pieces of jewelry.

This was a great project for me, at this particular time. I’ve been wanting to free myself up and increase the intermixing of spirit, imagination, and technique. Flow, I will call it. Making a bead flow into a piece of jewelry is something I have been sidling up to until now. It all happened here, and it was thrilling.

The lampwork technique was inspired (and instructed) by Sarah Hornik, whom I’ve admired for a couple of years. During the course of making these seven beads, I became much more proficient with my marver, maintaining the cylindrical shape of the bead as I was working in the colors and stripes. My stringer application still sucks, but with this bead it doesn’t matter that much since the stripes get swirled. Mostly, my dots turned out okay, a couple were not “perfect” — but I was happy with them, overall.

Another thing that made me happy was that the holes were nice and “innied” — no jagged bits to grind off. I think this is because I kept marvering the bead to shape as I was working it.

*Prepping: Each bead required making color choices in advance and pulling stringers. The beads are composed of a cylindrical base bead in a light opaque color (pink, yellow, blue were my choices); the top half of the cylinder encased with rubino oro or other light-hued transparent glass (I used rubino oro, light red, and light yellow). After I chose base and transparent, I then pulled stringers complementary stripes applied to the base, for melting and swirling into flowy shapes, and then for dots in the last step. I tried to use different color combinations for each bead, but a couple of them turned out looking a bit similar. I was a little tired by the last bead, and used stringers I had pulled for previous beads, but in a different combination.
Easter Lentils

Tonight I worked more on lentil shapes, trying to be more consistent.

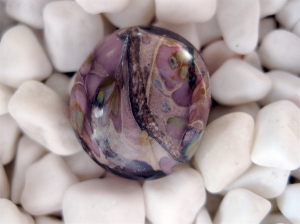
I chose to use purples, “Easter” frit, and violet pixie dust. Plus other inclusions (silver palladium, silver wire).

Had some near disasters with bubbles and grossly uneven encasing. Some tips I learned at The Gathering last year helped me not be so timid about grabbing tweezers and attempting fail control, mostly successfully.

Beads are soaking in the kiln right now. I LOVE having the kiln going while I’m working! It forces me to spend more time at the torch. And I don’t have to worry about batch annealing later, cuz sometimes later is just indefinitely delayed.

Purple Easter Lentil

Lentils (from Passing the Flame)

1. Base: Small barrel of transparent glass.
Darker is best. I tried red sparkle, medium olive, electric blue, and dark purple and they all look fine. The darker transparent seems to make a more dramatic background for the silver and reduction frit.

2. Add small dots of rubino oro. Melt flat.
I don’t have that, so I used the red sparkle. Can probably use gold aventurine, too.

3. Wrap in silver palladium, burnish, burn off.

4. Add some bits of reduction frit. Melt flat.
I chose matching colors for the red, olive, and blue, but also tried some raku. Raku rules!

5. Add random dots or swirls of silvered ivory stringer. Melt flat.

6. Encase in clear and melt to a nice round bead.
This is where my technique suffers. I am not great at doing a smooth encase, the base colors often surface between the layers of clear; and often, I have more clear in one spot and the bead is uneven.

7. Press in lentil mold.
My sizes and shapes were all wonky, because one of my deficits is making consistently-sized beads. I need to count the number of times I wrap the glass around the mandrel, and I haven’t been doing that. If you have too much or not not enough glass for the mold, both size and shape will be off.

Lessons learned:
* Keep a marver in non-dominant hand during shaping/melting flat steps. By the time I did my last few beads in this series, the barrel shape was actually pretty good and I was much more comfortable with the marver.
* Lay out correct amount of silver palladium beforehand.
* Don’t add too much frit: it takes over the bead.
* Regain barrel shape before encasing.
* Use Lauscha clear for encasing. It’s just the cleanest!
* Don’t overheat after encasing.
* If bead is too small, the lentil shape will not “take” very well.
* Bead needs to be perfectly round with hole exactly in the middle. Period.

I’m looking forward to getting the new lentil mold: it has 3 different sizes in one mold, so designing jewelry within a set will be easier. The shape is a nice canvas for all kinds of fun stuff!

earth lentil

Passing the Flame

I really like Passing the Flame. I love the step-by-step photos and larger font primary instructions. Loads of detail, and covers just about everything a beginning/intermediate flameworker would want to know.

Since I don’t currently have a “project,” I must make my own. And here it is:

Open to a random page in the book and make that bead for a week, using complementary colors in order to create a piece of jewelry (or other beaded piece) for someone I love.

Starting next week, as I should be getting some groovy new brass molds from Zooziis. I made a bunch of lentils this week using a cheap-o mold, so am convinced that you get what you pay for; but I shouldn’t blame the mold — I have a lot of technical know-how I need to catch up on.

Will post pix of lentils later today, and try to keep up with production on this blog.